
3S
3Shape TRIOS
User guide (PDF)
Recommended scanning procedure for implant-supported provisional restorations.
Download
/files/3SHAPE.pdf
AssistLogiQ
Workflow overview in AssistLogiQ: from login and optional scanner calibration, through Data Sets 1–3 to ZIP export and sharing with the laboratory.
Important before use
All-on-X / abutment-level workflow
Primary platforms: Nobel Multi-Unit Ø4.8, Straumann® SRA Ø3.5/Ø4.6 and Biomet 3i® Low Profile Ø4.8. The coronal prosthetic interface of the abutment is decisive.
Not an implant-level system
Validates the IOS workflow for full-arch cases at MUA level; it does not measure implants at implant level.
Not photogrammetry
This is validation of consistency across Data Sets, not absolute measurement.
Input quality matters
The software detects inconsistent IOS data and prompts the user to repeat the acquisition.
Video guide
Practical demonstration of the complete protocol: from the calibration plate, through the Data Set workflow, to delivery of the outputs. The video is suitable for internal training in both the clinic and laboratory.
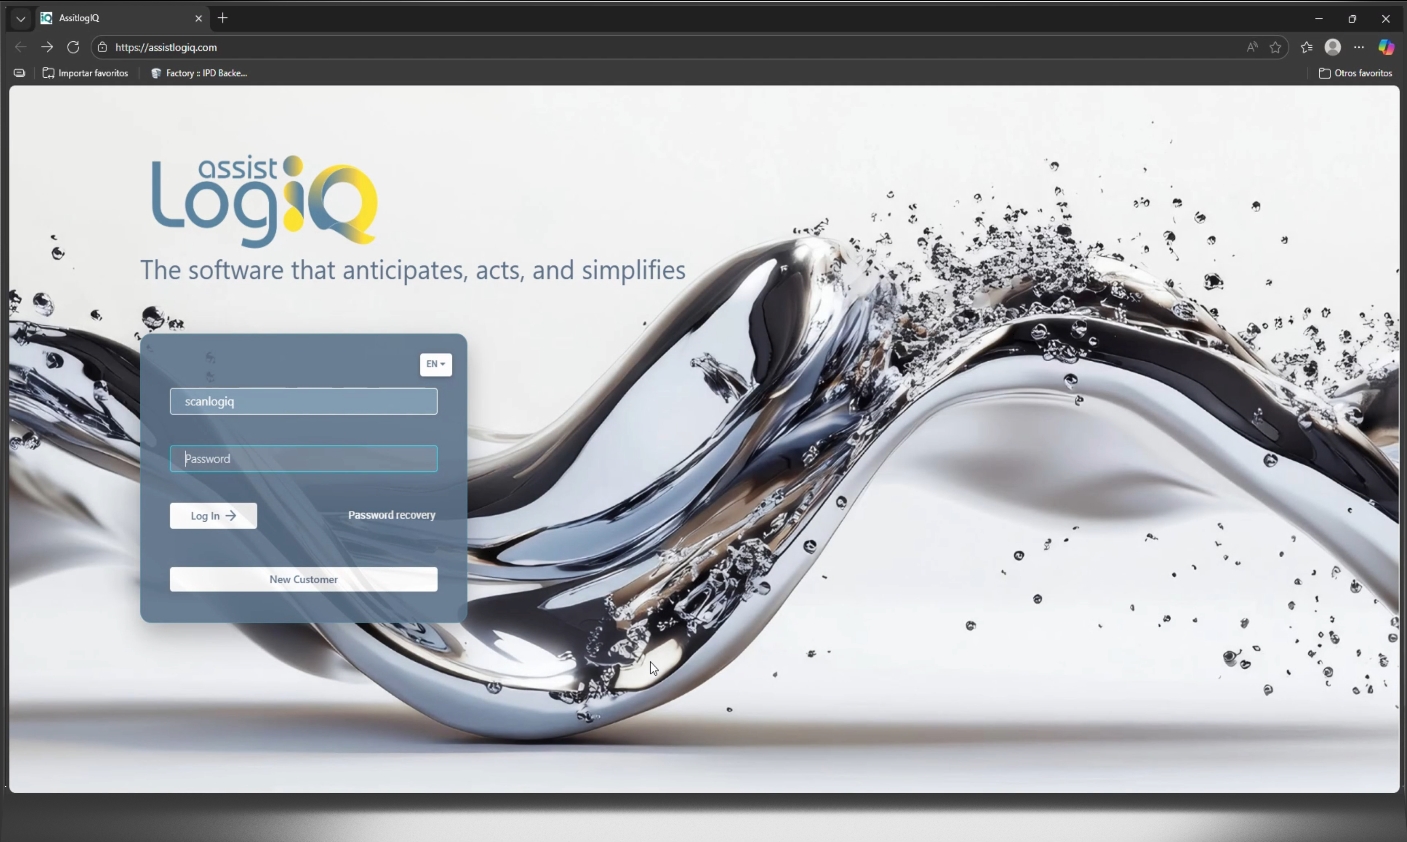
Resource hub
An overview of materials that help standardise the workflow between clinic and laboratory.
Step by step: what to scan, when to validate and what to hand off to the laboratory.
Scope of indications: Multi-Unit only, not implant level, not photogrammetry.
Manufacturer-recommended procedures for maximising the quality of the input scan.
A quick check of whether the workflow is appropriate for your case type.
Main ScanLogiQ page: why full-arch workflows fail and what the system addresses.
We can quickly verify platform compatibility and recommend a workflow for your case.
Ecosystem
ScanLogiQ is a workflow designed for intraoral scans without being tied to a specific scanner brand. To maximise input-data quality, we provide manufacturer-recommended procedures for download here.
User guide (PDF)
Recommended scanning procedure for implant-supported provisional restorations.
User guide (PDF)
Recommended intraoral scanning and data-export procedure for the laboratory.
User guide (PDF)
Recommended scan workflow for implant-supported provisional restorations and a stable mesh.
User guide (PDF)
Recommended scanning procedures for implantology and full-arch indications.
These documents are practical recommendations from IOS manufacturers. ScanLogiQ validates data consistency within the workflow, but it does not overcome the physical limitations of the scanner or incorrect scanning technique.
Before opening the individual screens
The detailed guide below explains how to operate AssistLogiQ. This map first shows where the individual Data Sets fit within the complete case and what happens to the validated data after they are handed off to the laboratory.
Clinic · 1–6
Data and laboratory · 7–10
Clinical completion · 11
11
The definitive restoration is verified clinically and then delivered. A DRAFT output from 1–2/4 validated scans is intended for a passive-fit test / verification framework, not as the recommended basis for a definitive framework.
Scan Flag iQ = validation step
Data Set 2 consists of four separate scans. AssistLogiQ compares their consistency and, according to the result, generates a DRAFT / reliable / highly reliable output.
Reverse iQ = registration step
Data Set 3 is optional and transfers information from a provisional restoration / prototype / try-in. Its role is not the same as the 3/4 validation logic of Data Set 2.
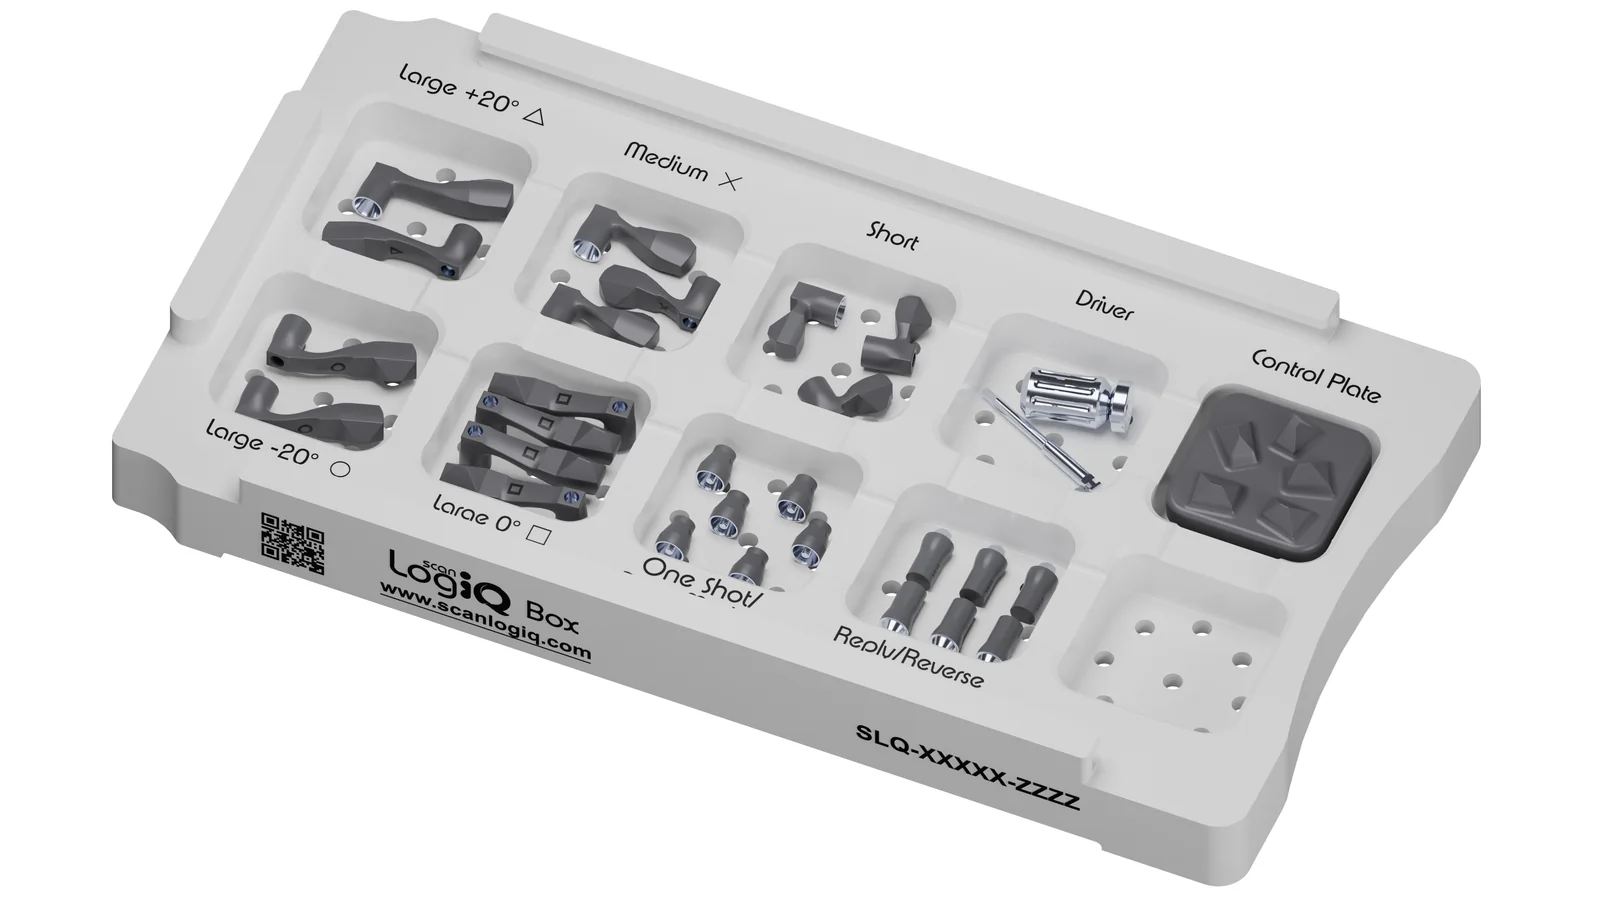
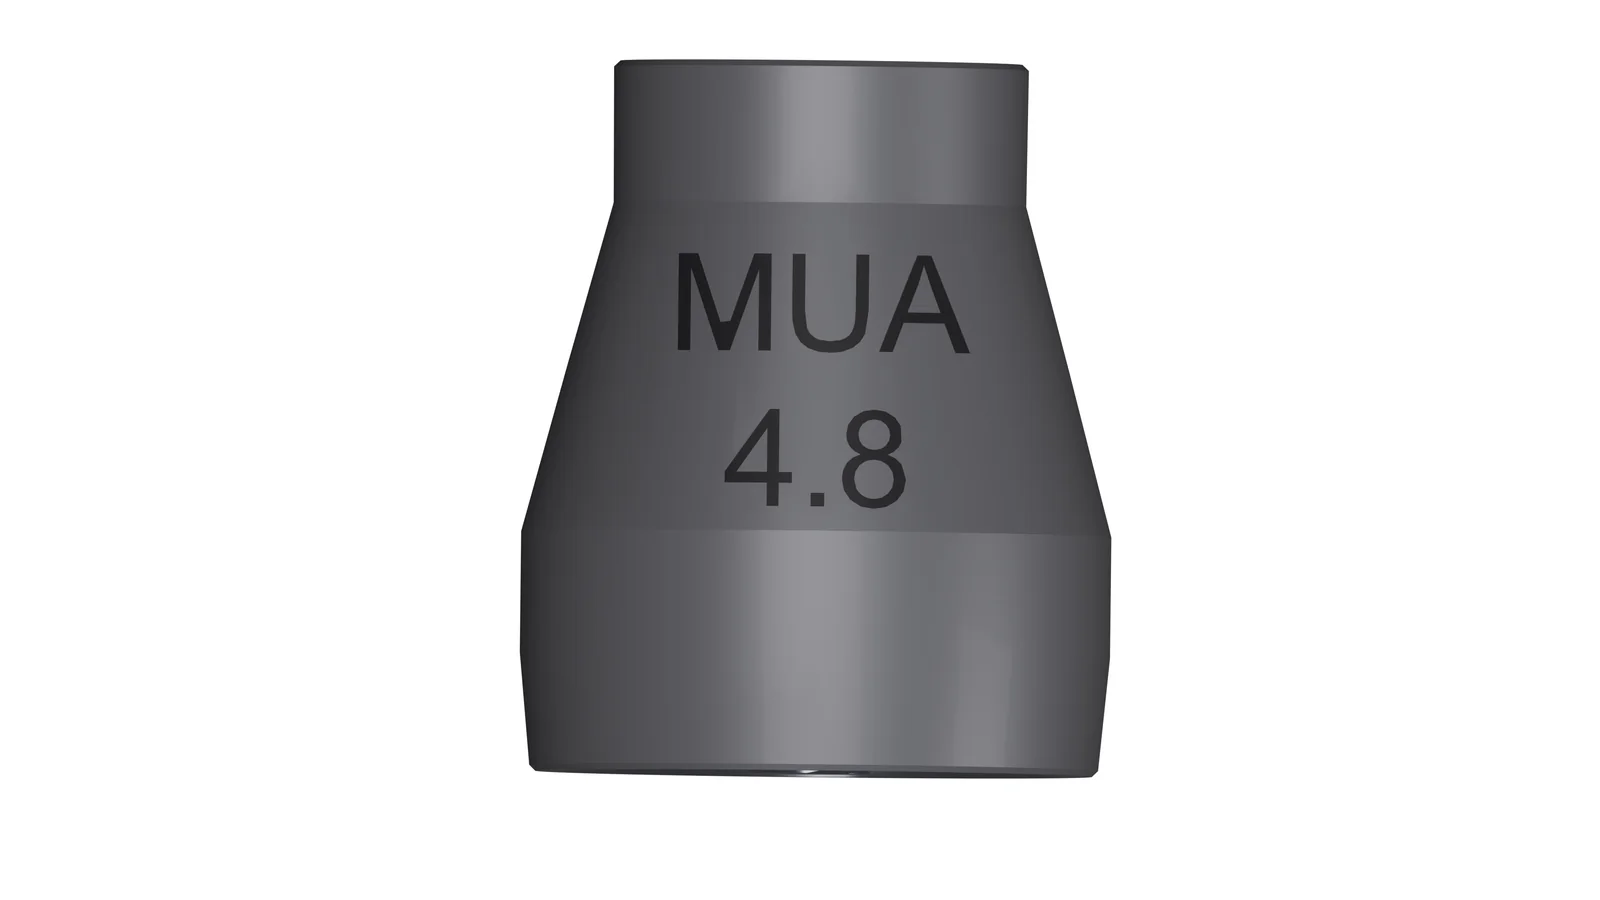
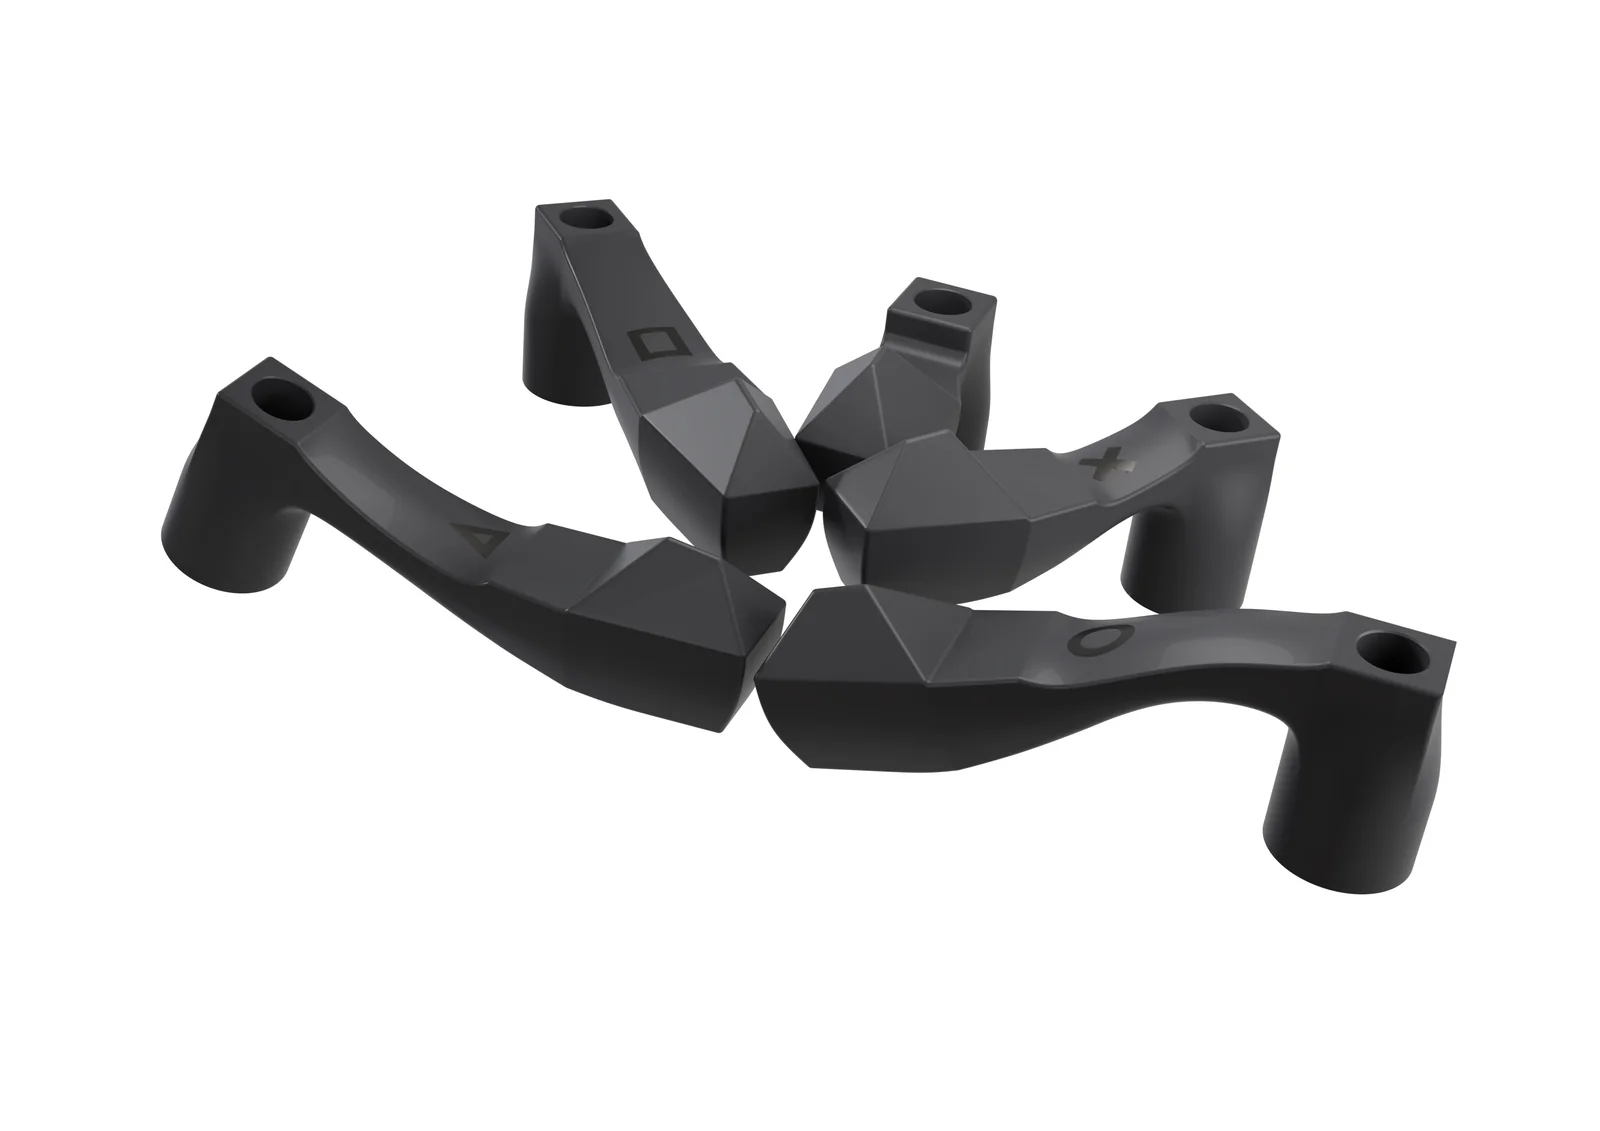
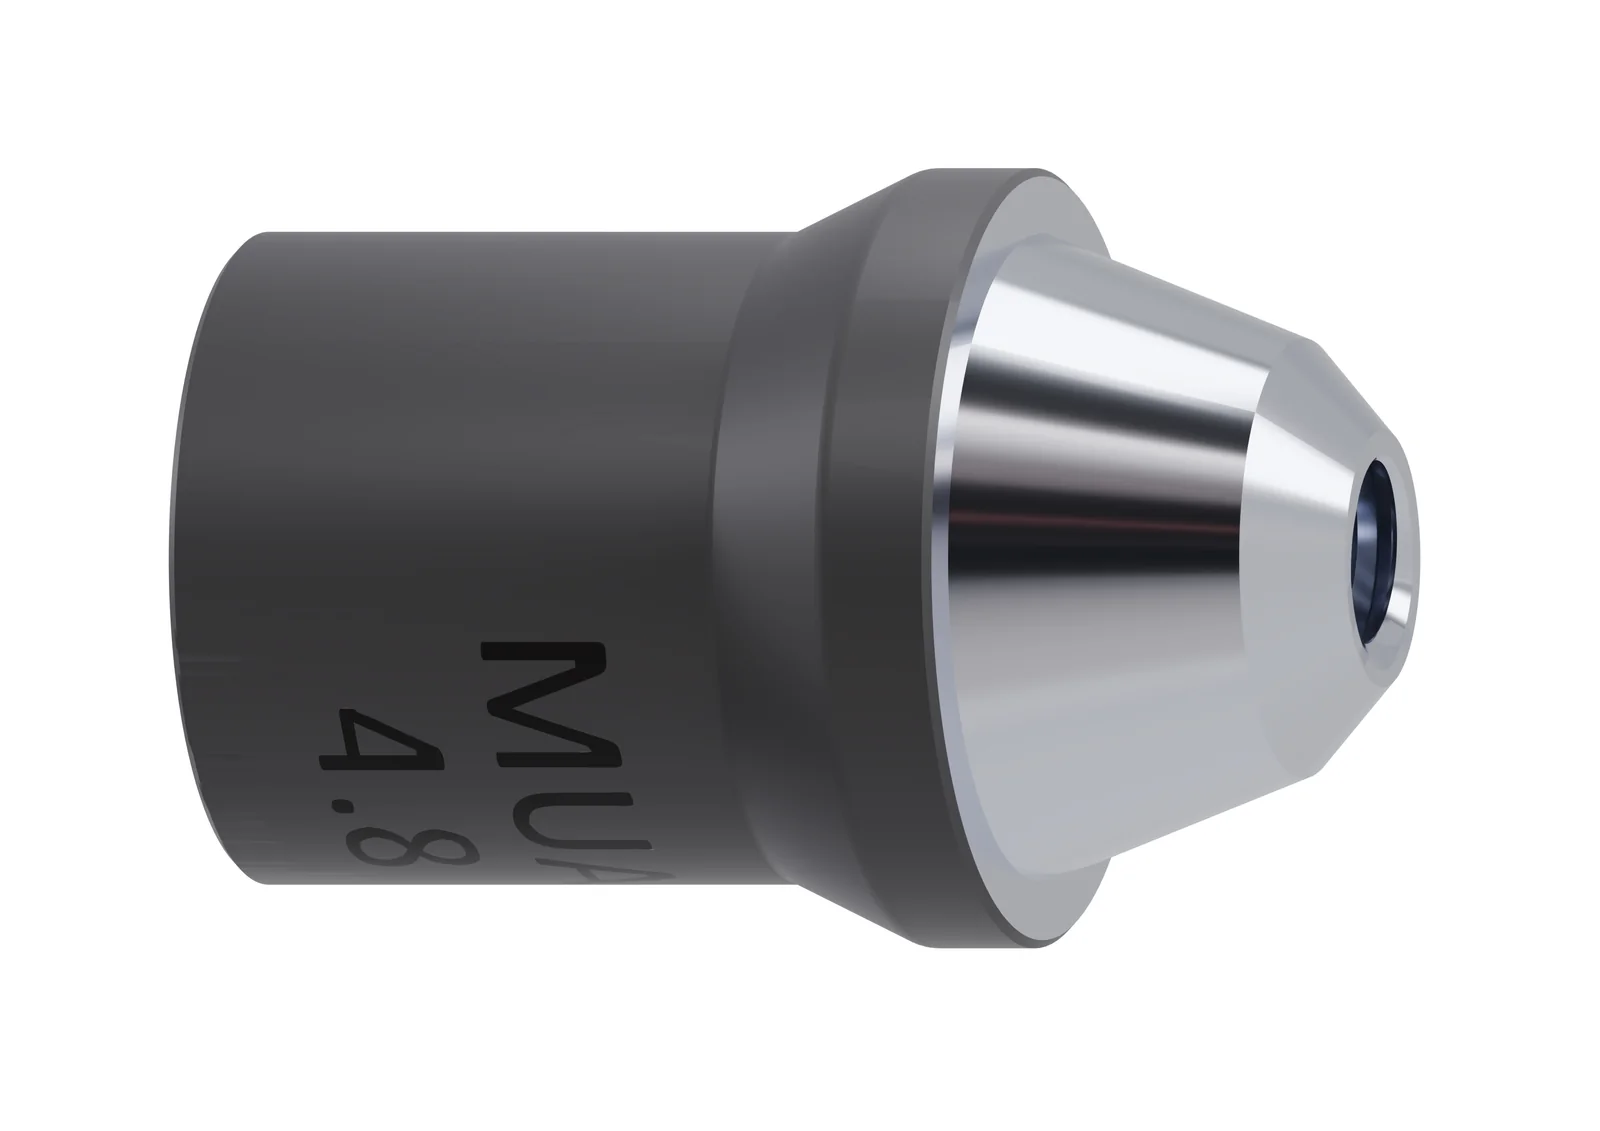
Step 1
Open https://assistlogiq.com/
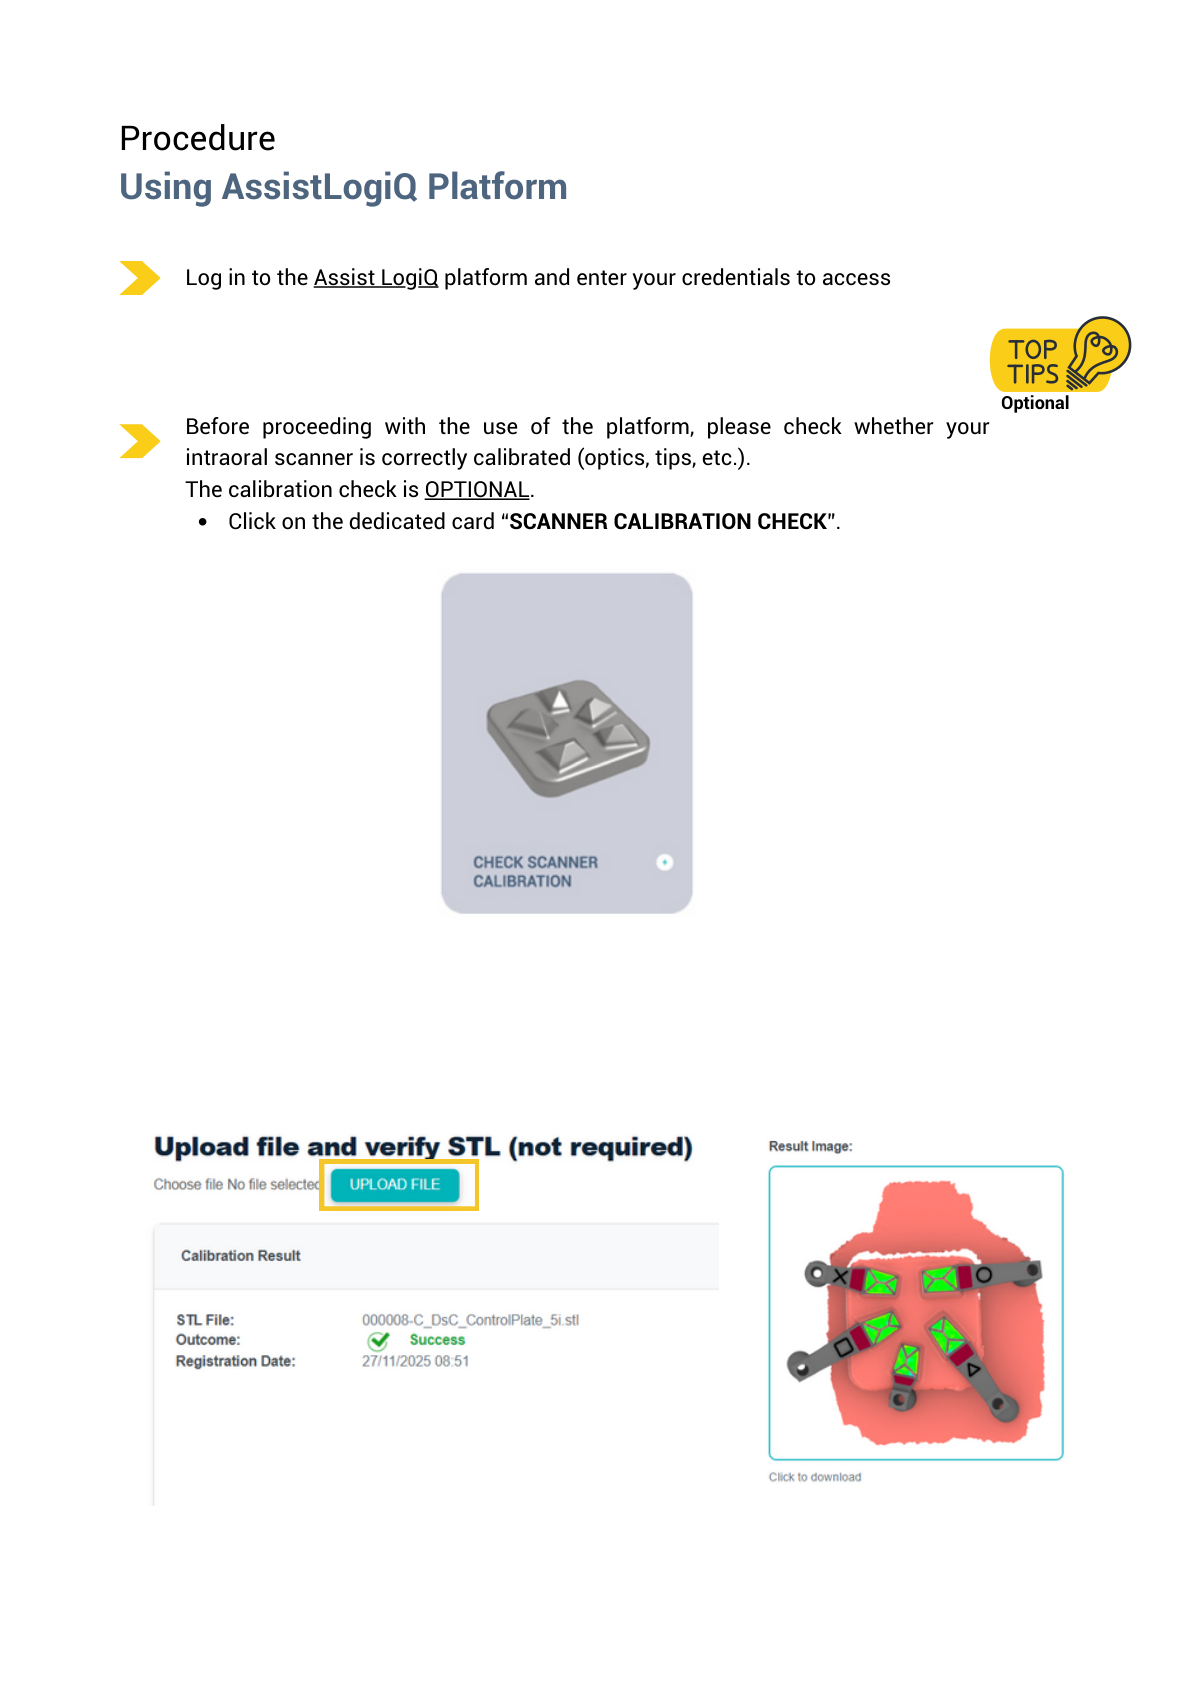
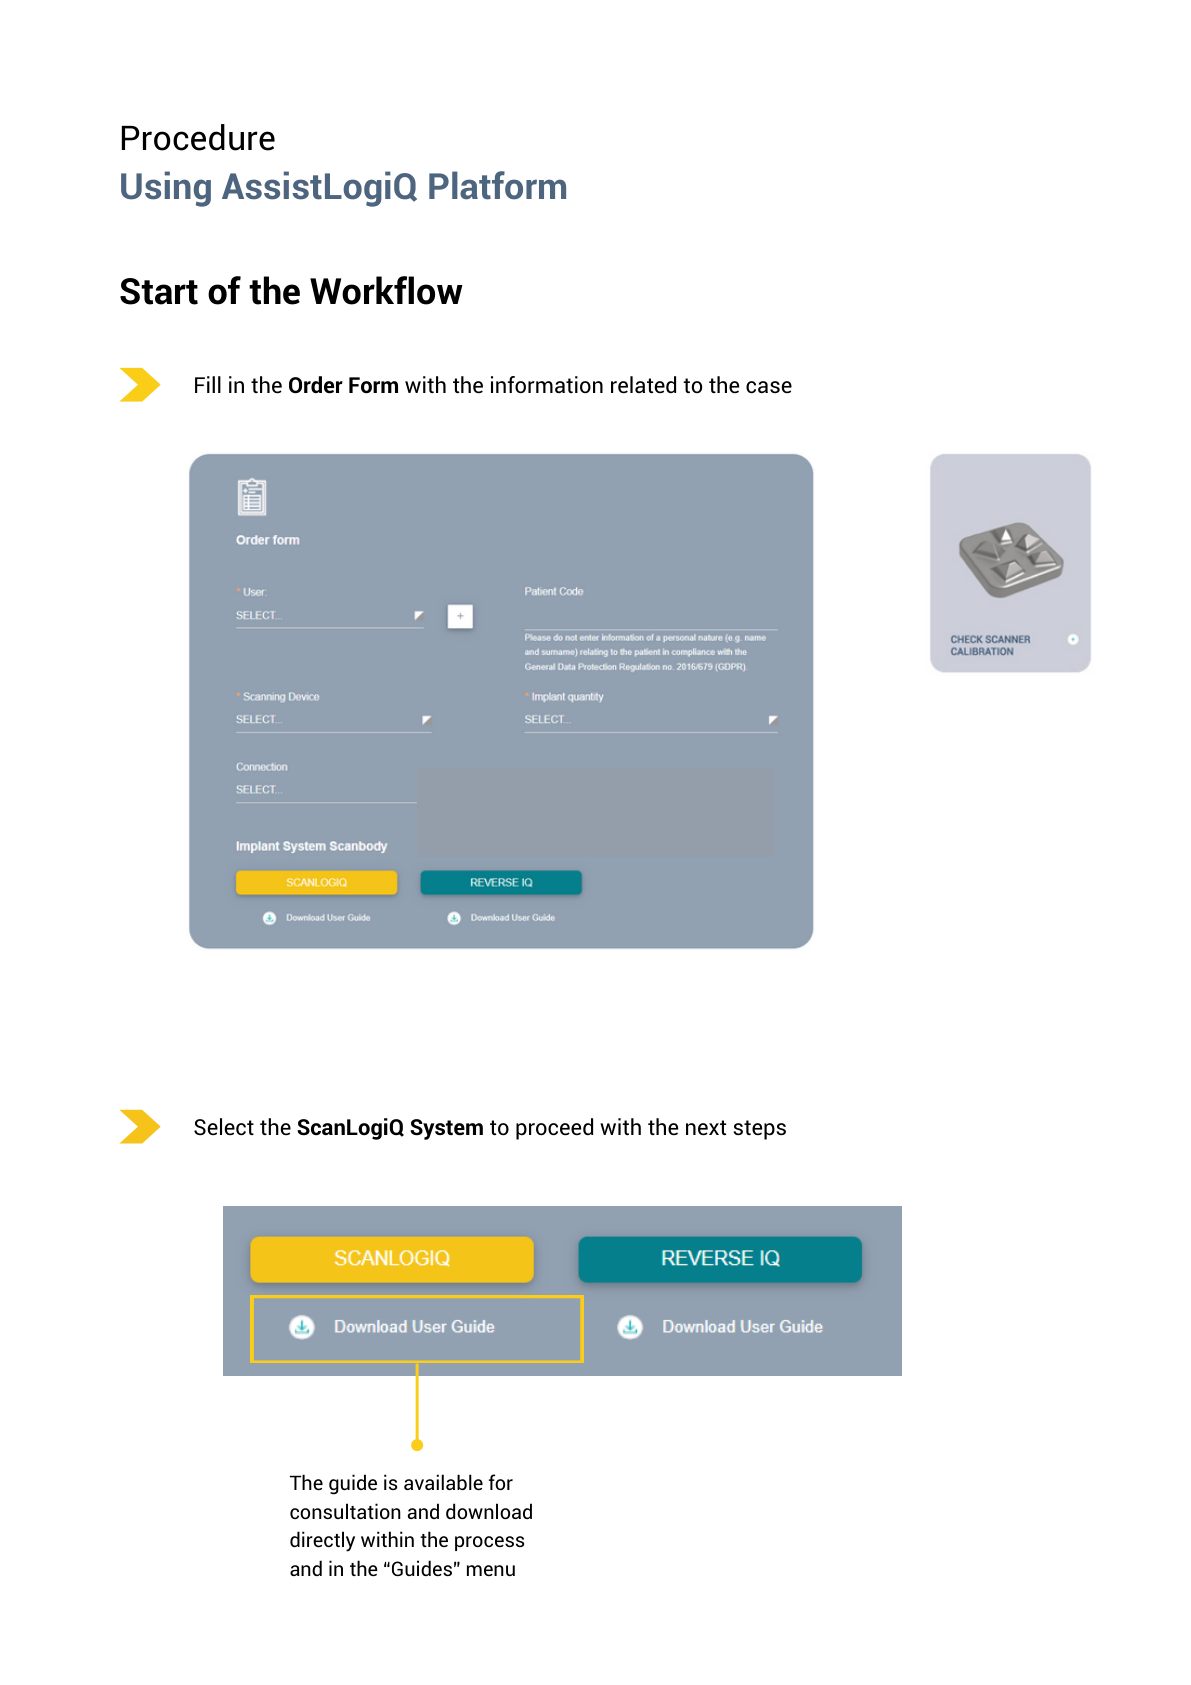
and log in with your username and password. The portal also provides “Password recovery” and “New Customer”. A URL containing a parameter msg=Sessione%20Scaduta only indicates an expired session; use the root URL for a new login. Before starting the workflow, it is recommended to check that the intraoral scanner is correctly calibrated (optics, scan tips, etc.). The calibration check is optional and is performed through the “Scanner Calibration Check” card.
Step 2
Complete the Order Form with the case information and select ScanLogiQ Systemto unlock the next steps. The user guide is available directly within the process and in the “Guides” menu, both for quick reference and download.
Step 3
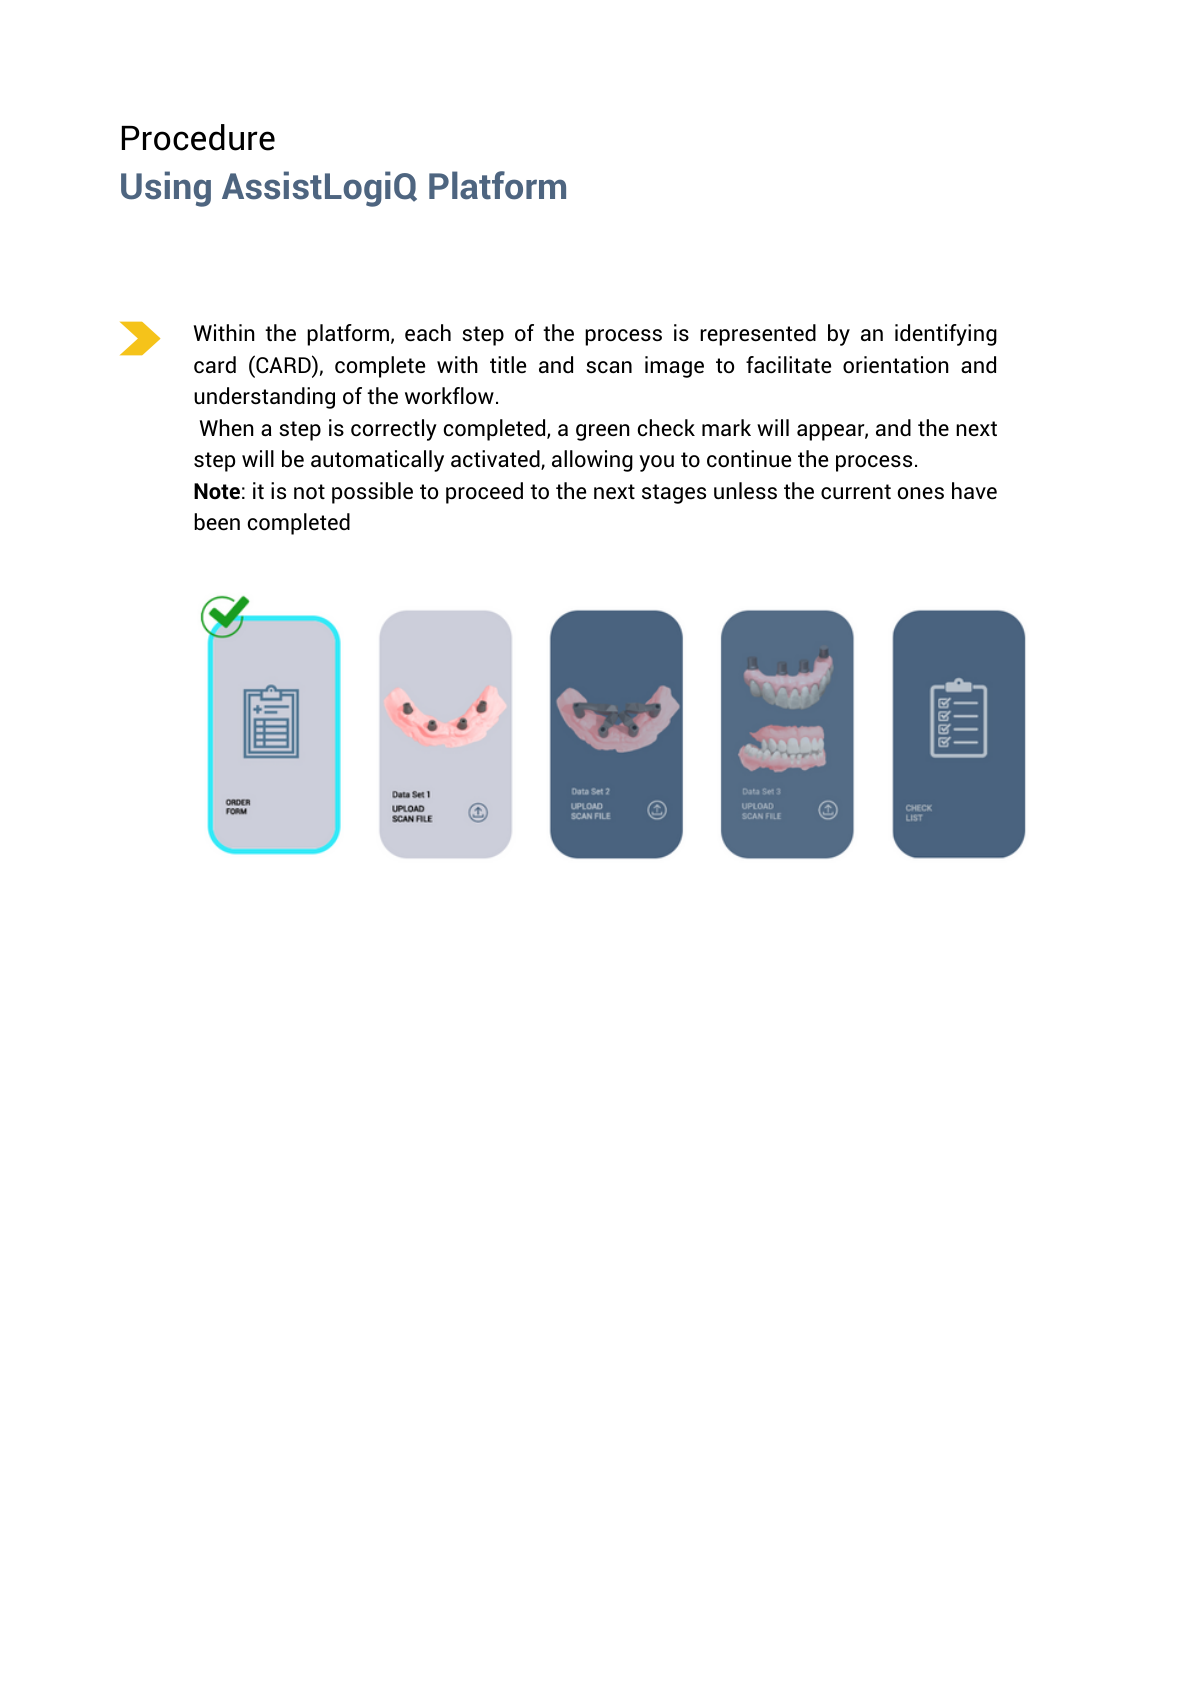
Each step is represented by a card with a name and scan preview. When a step is complete, a green confirmation appears and the interface guides the user to the next step. For Data Set 2, however, AssistLogiQ does not technically block the output; result quality is determined by the number and status of validated scans.
Step 4
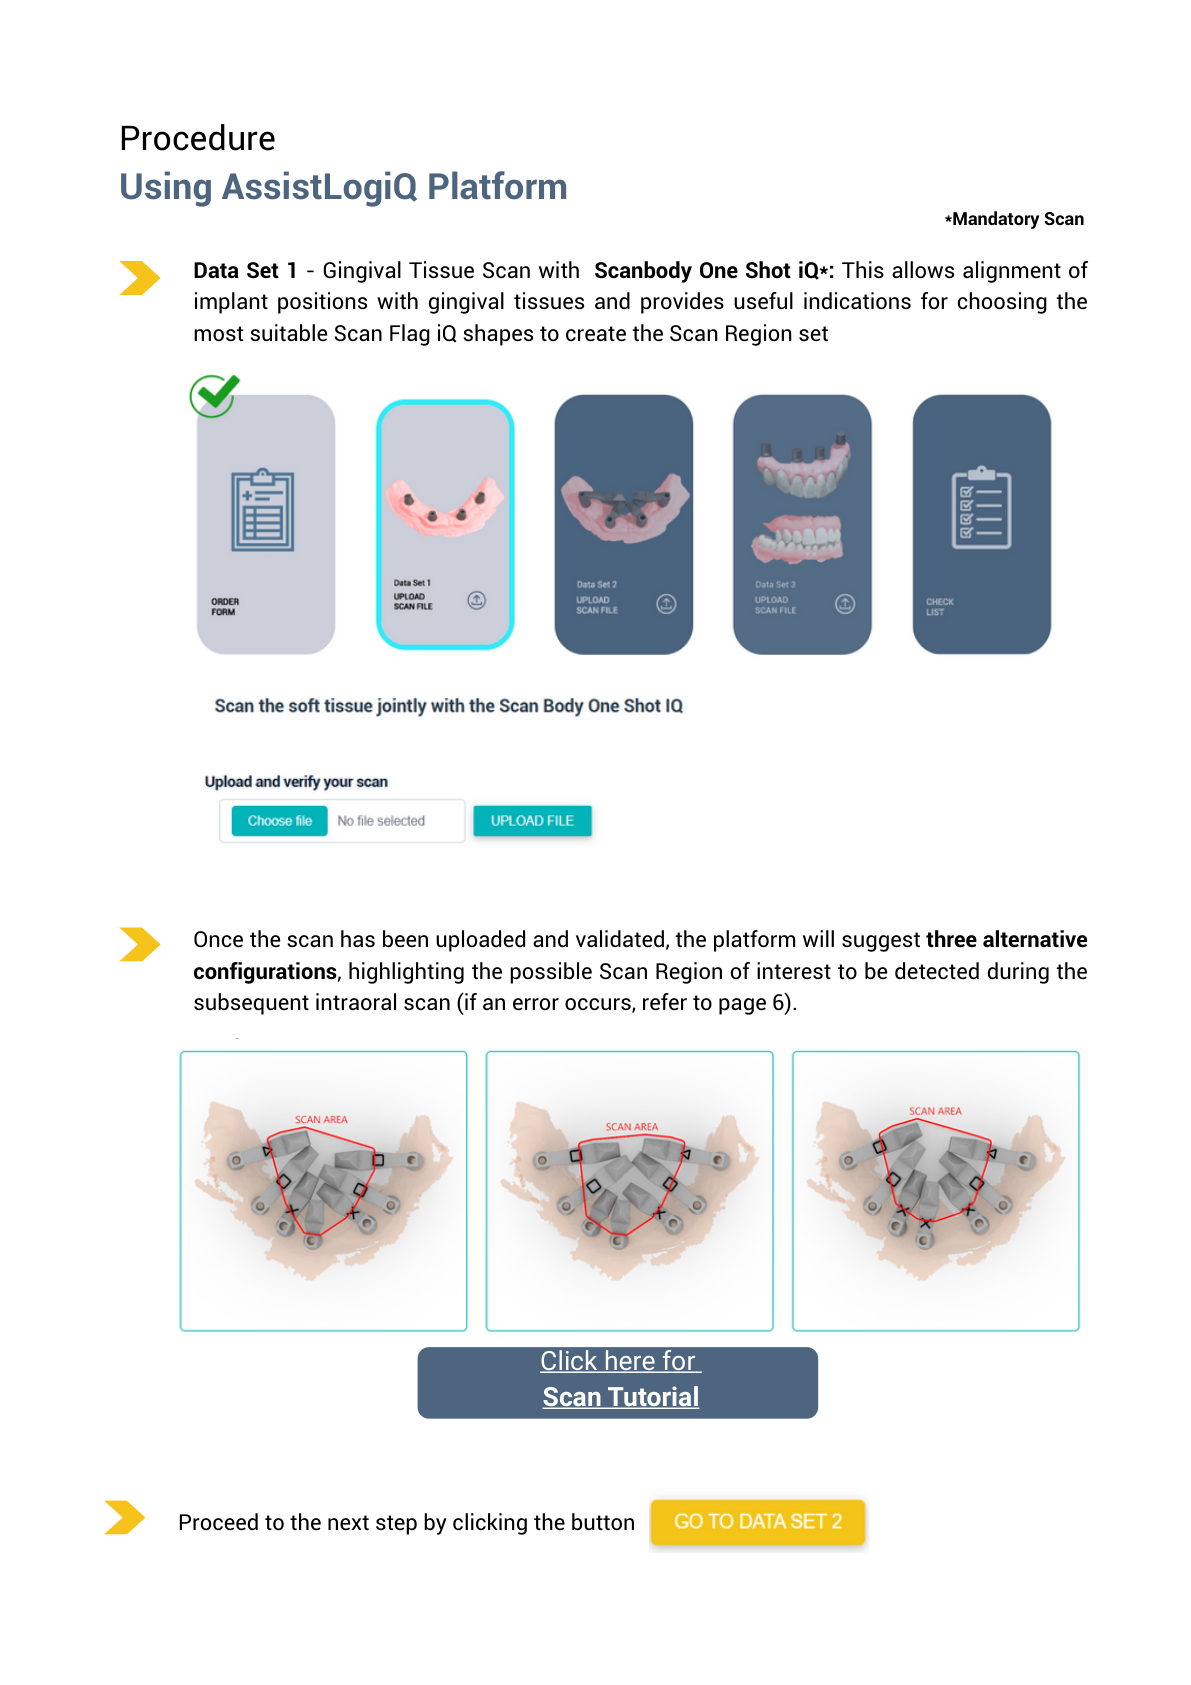
Data Set 1 is the mandatory soft-tissue scan using the scan body One Shot iQ. It is used to align implant positions with the gingival tissues and provides information for selecting suitable Scan Flag iQ (Scan Region).
After upload and validation, the platform proposes three alternative configurations and highlights a possible Scan Region for the subsequent intraoral scan.
Step 5
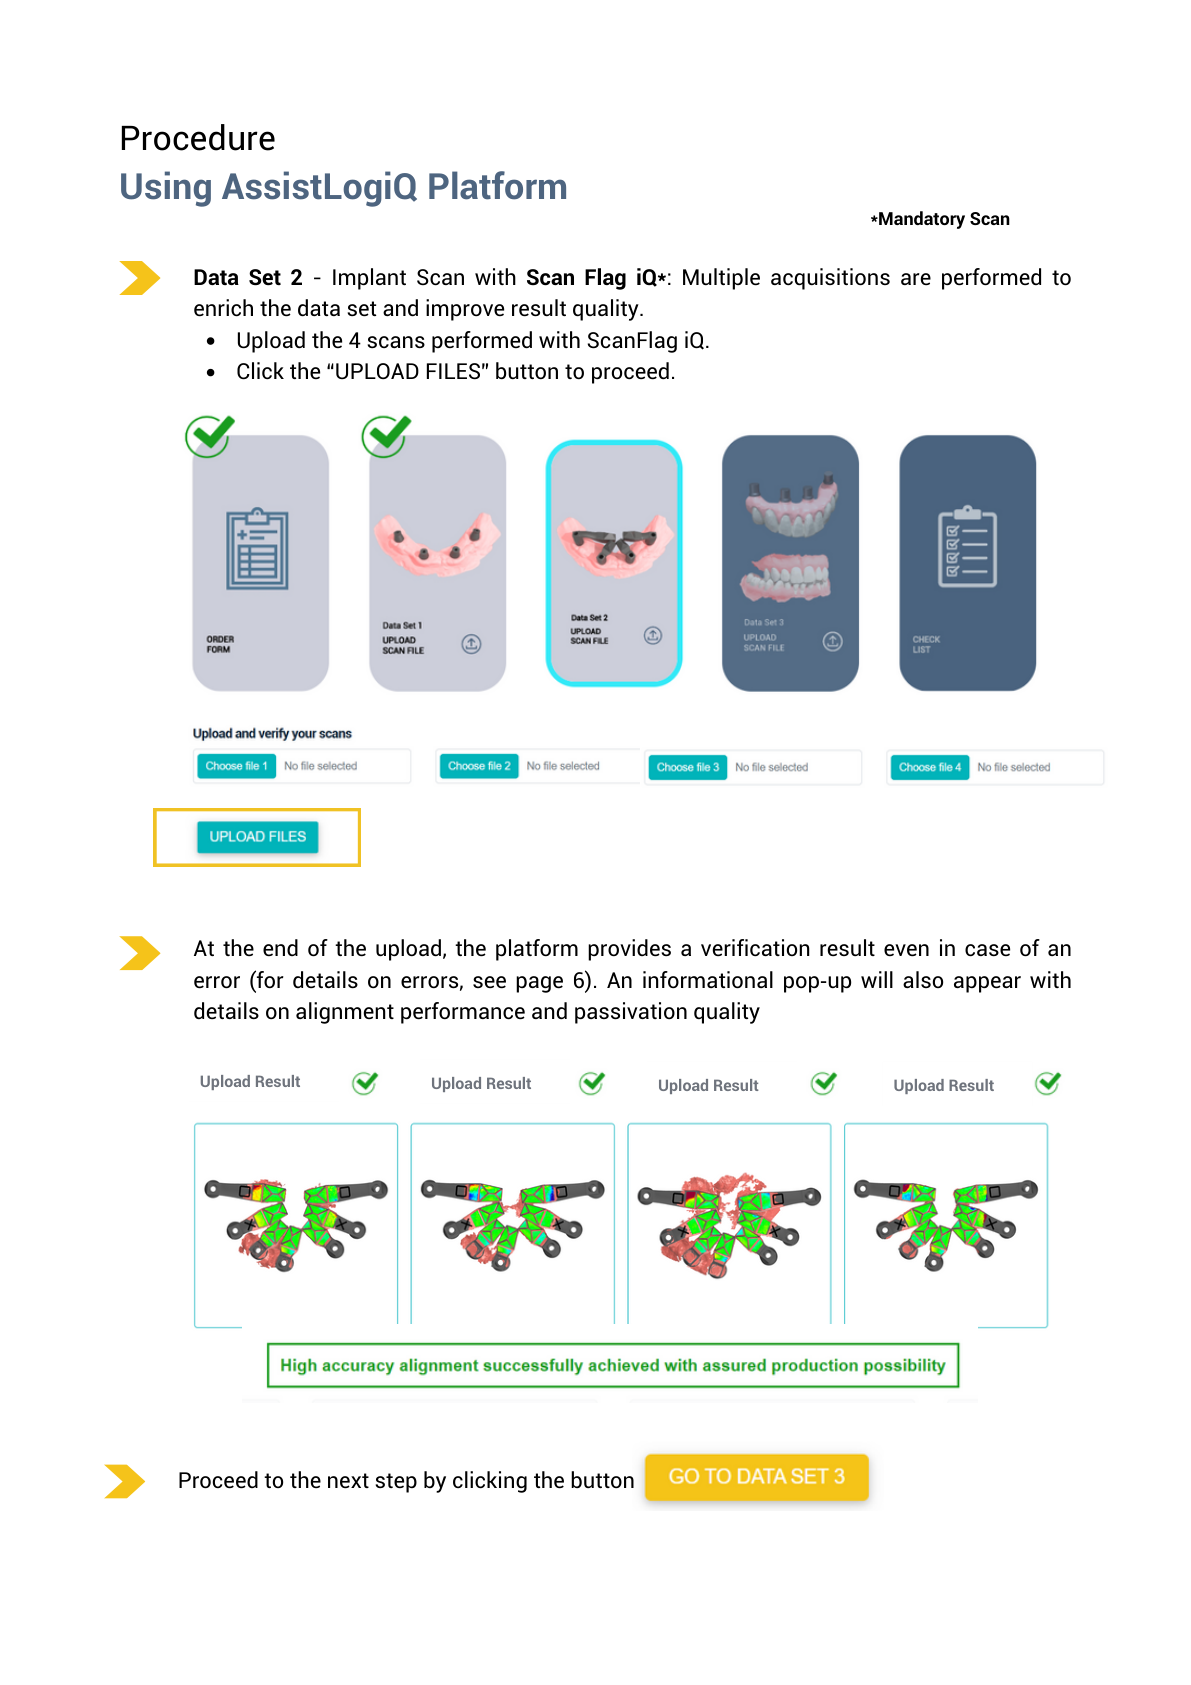
Data Set 2 is the mandatory scan of implant positions through the supported MUA platform using Scan Flag iQ. Multiple acquisitions are made to enrich the Data Set and improve result quality. Upload 4 scans and continue with the “Upload Files” button.
Why 4×? More consistent scans increase the statistical reliability of validation and reduce the risk of “silent drift” during full-arch stitching. The manufacturer describes four scans as an optimal compromise between time, usability across IOS systems and statistical benefit.
How to interpret the Data Set 2 result
At the end of the upload, the system returns a verification result even when an error is present. An information window also displays details of alignment performance and passive-fit quality.
Step 6
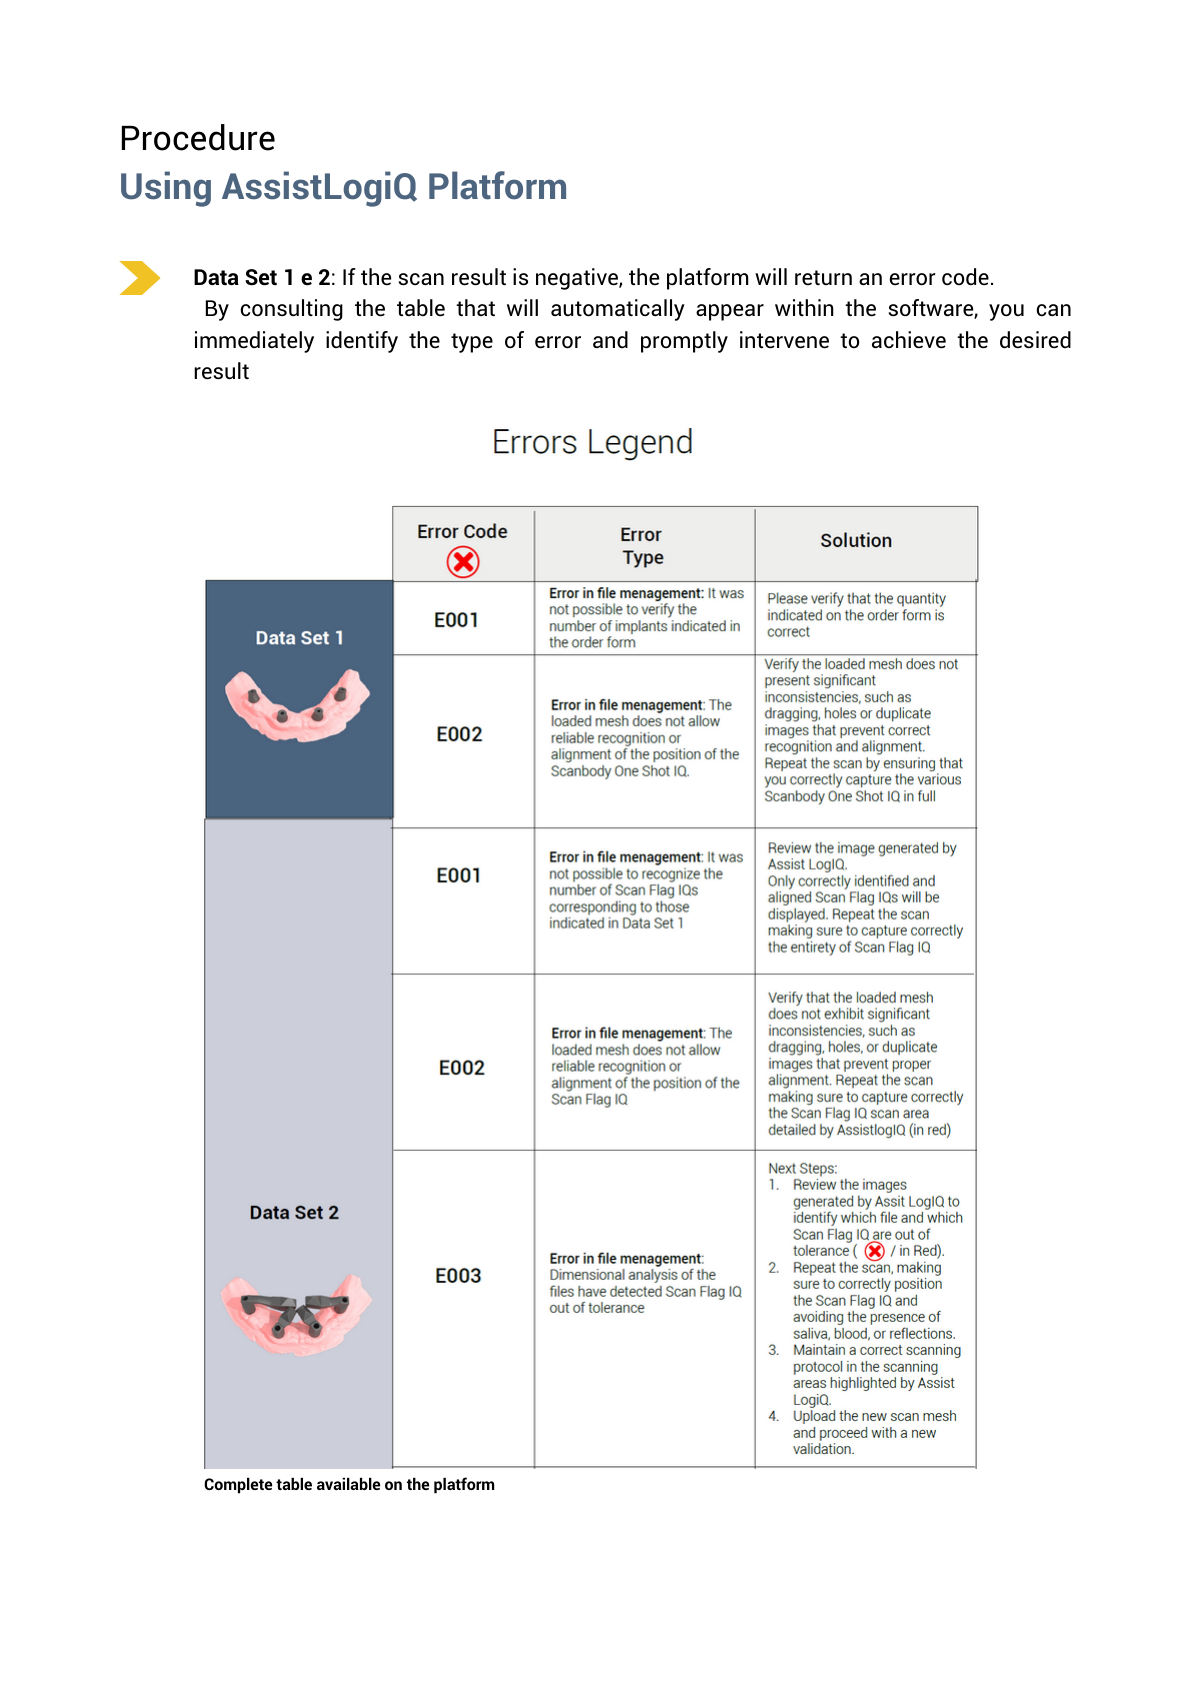
If the Data Set 1 or Data Set 2 result is negative, the platform returns an error code. The software automatically displays a table that makes it easy to identify the error type and the recommended action needed to achieve the required result.
Prakticky: most commonly, this involves mesh-recognition problems, insufficient capture of key areas, or inconsistencies such as holes or duplication that prevent reliable registration.
Step 7
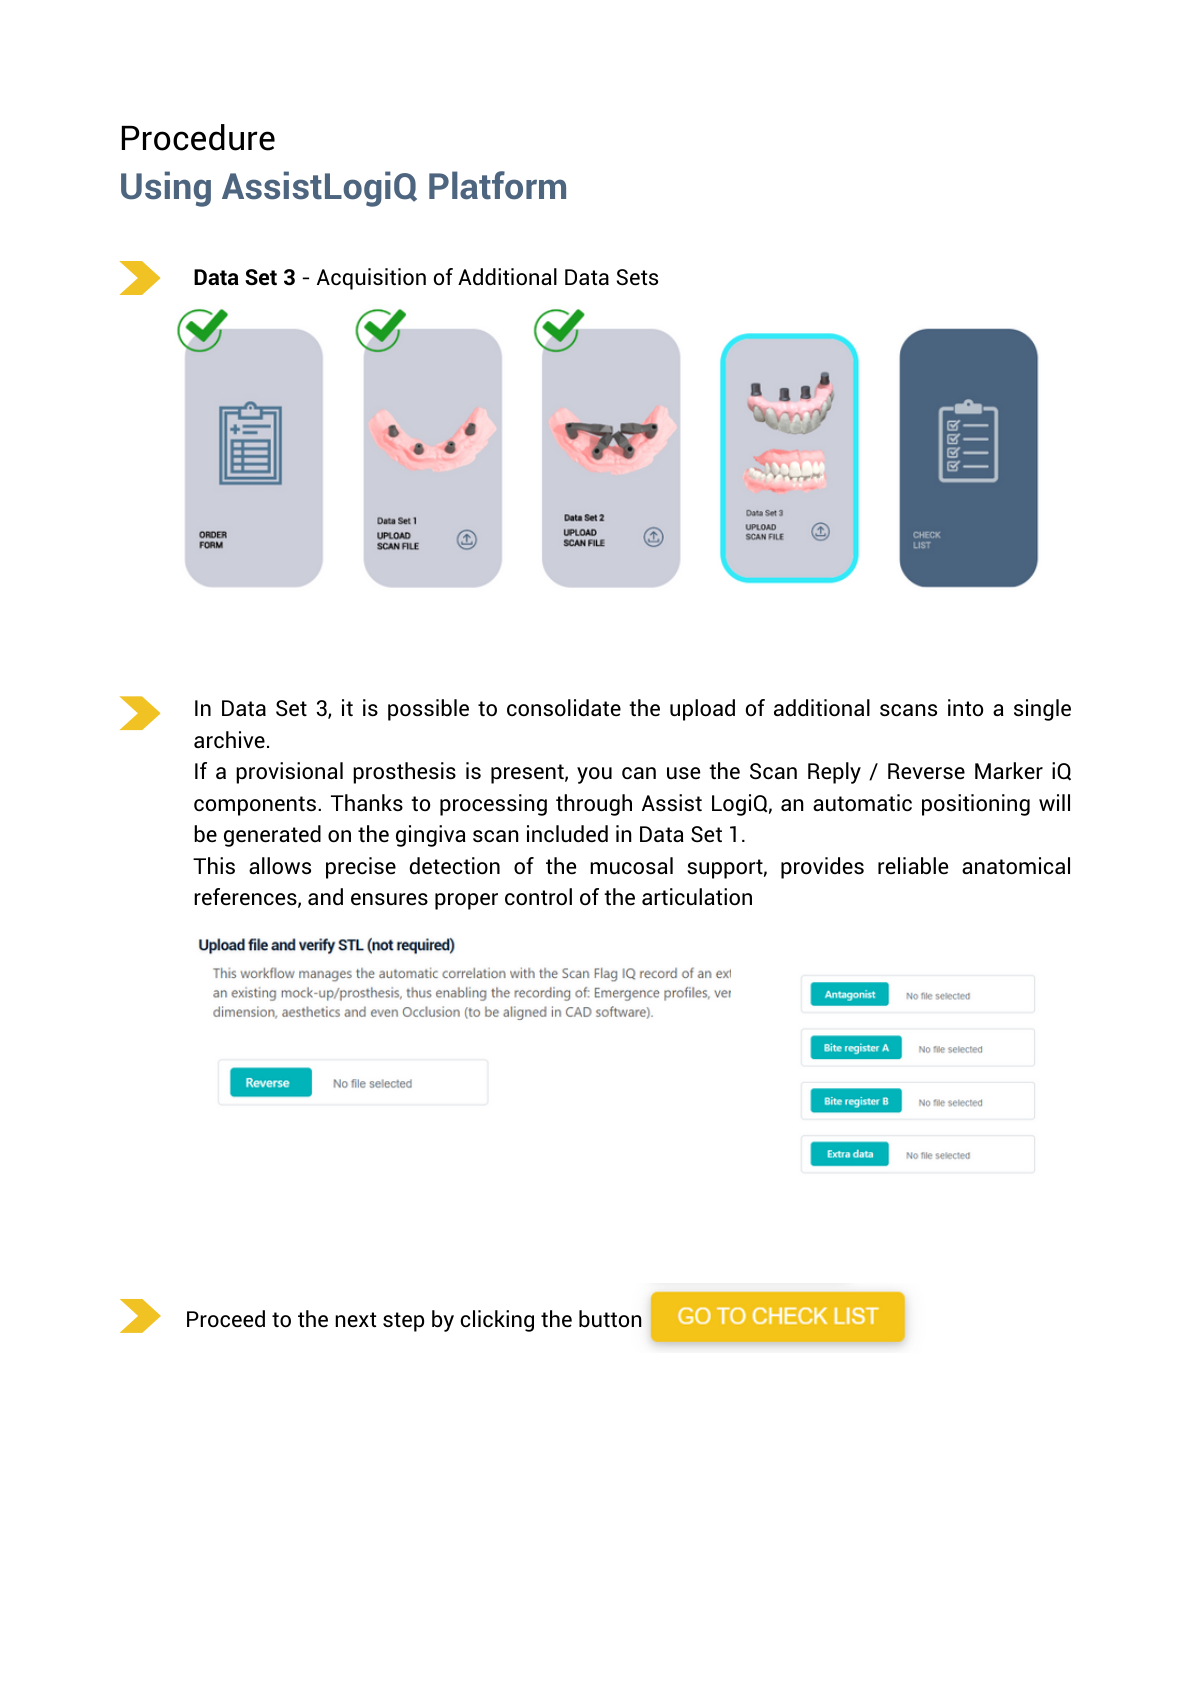
V Data Set 3 can include scans of a provisional restoration, try-in or prototype. Reverse workflow uses Reverse iQ, which enables extraoral digitisation of an existing suprastructure, such as milled PMMA or printed resin, and registration against the case reference data.
In practical terms, this transfers occlusal, aesthetic and soft-tissue relationships into the definitive design. We describe this step as alignment / correlation; the available documentation does not establish that Data Set 3 uses the same standalone 3/4 validation logic as Data Set 2.
Outcome files → aligned meshes → SLiQ CAD
The resulting data connect the clinical phase with the laboratory.
Step 8
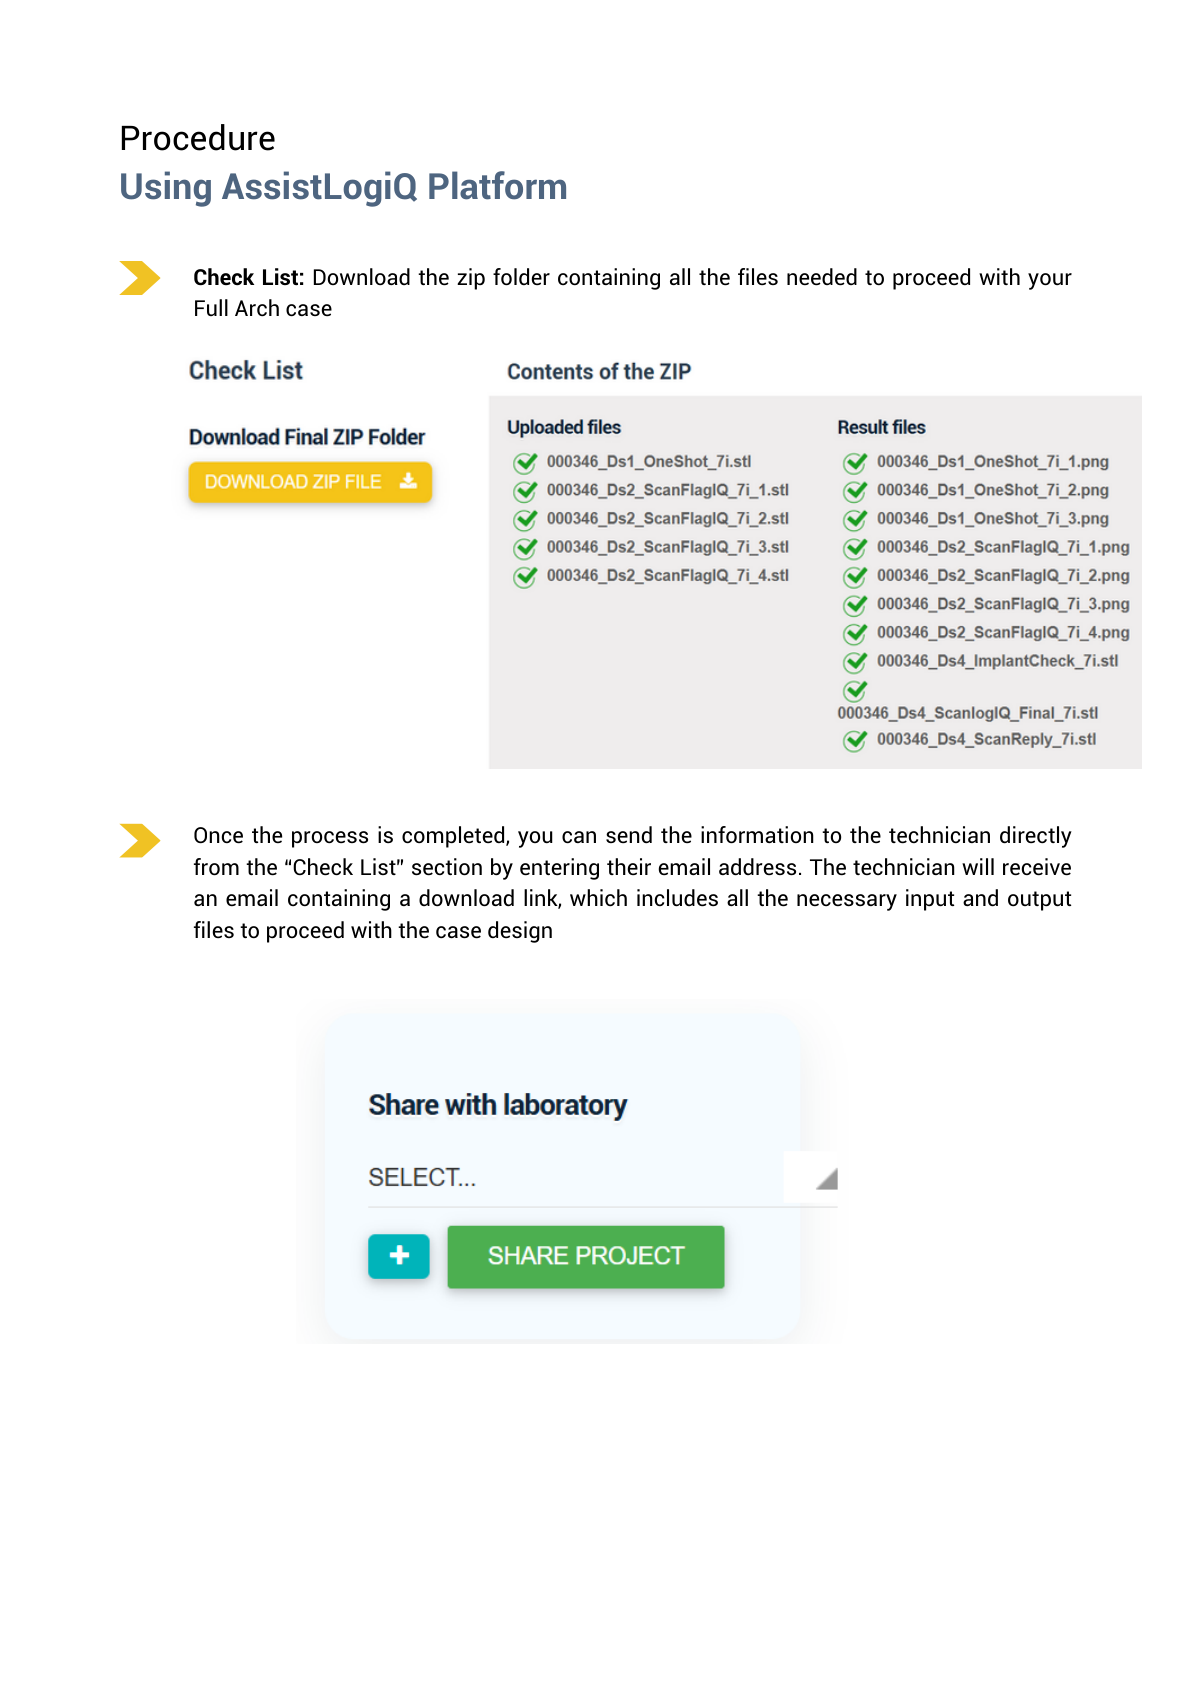
Data Set 4 closes the ScanLogiQ workflow by exporting the resulting validated files. The manufacturer describes the output as outcome files / aligned meshes; the ScanLogiQ Final result contains SLiQ alignment mesh linked to the corresponding IPD CAD files.
Step 9
In the Check List section, download the ZIP folder containing all files required to design the full-arch restoration. Once complete, case information can be sent directly to the technician from the Check List by entering an email address. The technician receives an email with a download link containing all case inputs and outputs for design.
Clarification
Short answers to the most common questions so that the workflow is used correctly and without exaggerated expectations.
Is AssistLogiQ photogrammetry?
No. It is software for statistical validation of consistency across intraoral-scan Data Sets.
Does it support implant-level impressions?
No. The workflow is intended for full-arch restorations on Multi-Unit abutments.
Why do I need to upload 4 scans in Data Set 2?
Four scans are acquired. At least 3 green scans are required for a reliable result; 1–2/4 produce a DRAFT output and 4/4 provides the highest level of reliability.
Does it depend on IOS quality?
Yes. AssistLogiQ flags inconsistencies and recommends corrective action. The workflow is not technically blocked; however, at least 3 green scans out of 4 are required for a reliable final result.
What does “Works with any scanned structure” mean?
It refers to the Reverse iQ markers and the selected workflow type. A clinically validated result still requires a supported MUA platform.
How do I verify passive fit?
An optional verification step, such as a test framework, can be used as an additional check according to the protocol of the clinic or laboratory.
Does the implant brand beneath the MUA matter?
After a screw-retained abutment is placed, ScanLogiQ depends on its coronal prosthetic interface. Similar-looking MUAs are not necessarily fully compatible, so verify the specific reference.
Is ScanLogiQ intended for a single crown?
Standard ScanLogiQ is described by the manufacturer as an All-on-X / full-arch workflow. The IPD Multi-Unit itself may also have a single-unit indication, but that is a separate question from the indication for ScanLogiQ.
What is Data Set 4?
The final export of outcome files / aligned meshes. Through the SLiQ CAD files, the result feeds into laboratory design of the prosthetic restoration.
Can I proceed with a zirconia bridge on Ti-bases?
Yes. IPD lists a Ti-base workflow with either a straight screw channel or ASC among the supported options, as well as Direct-to-MUA solutions for Zr/PMMA.
Scan Flag iQ vs. Reverse iQ?
Scan Flag iQ is Data Set 2 and carries the four-scan validation. Reverse iQ is optional Data Set 3 for registering a provisional restoration / prototype / try-in and additional relationships.
Where do I log in?
Na assistlogiq.com. The portal provides Login, Password recovery and New Customer; account activation is handled by IPD.
Documentation
Manufacturer-recommended procedures for scanning implant-supported restorations and provisional work. They help maximise the quality of input data for the ScanLogiQ workflow.
Downloads
Centralised resources for quick orientation in the ScanLogiQ system and AssistLogiQ software, suitable for clinical practice, the laboratory and internal training.
A practical guide to the AssistLogiQ workflow, from login through the individual Data Sets to export and sharing with the laboratory. This page serves as a quick companion to the official PDF manual.
Recommendation: Suitable for internal team training (clinician, assistant, laboratory) and as a quick reference when implementing the workflow.
A consolidated overview of the ScanLogiQ system: kit components, scan-body types and the recommended step-by-step workflow. The brochure is in English; below we provide a short commentary for quick orientation.
What the brochure clearly shows
Note on use
Some materials may show Scan Flag iQ demonstrated directly on implant fixtures. The clinically supported and recommended use for the final full-arch workflow, however, is at abutment level (Multi-Unit, Straumann® SRA, Biomet 3i® Low Profile).
Implant-level use would require platform-specific scan bodies corresponding to the particular implant connection. Standard ScanLogiQ is optimised for an abutment-level reference.
Surgical / planning phase
Orientation to implant positions and verification of placement.
Full-arch prosthetic phase
Abutment-level reference for designing the final restoration.
New interactive guide
This practical page connects clinical steps, data verification, ScanLogiQ/AssistLogiQ and passive-fit verification in extensive implant cases.
I am a healthcare professional within the meaning of Section 2a of Czech Act No. 40/1995 Coll., on the Regulation of Advertising. I confirm that I am authorised to access pages intended for healthcare professionals.